
Posts
The Upwork Advantage: Skyrocketing Your IT Sales CareerSales

The Upwork Advantage: Skyrocketing Your IT Sales CareerSales
In the dynamic world of IT sales, Upwork stands out as a powerful platform, connecting skilled professionals with businesses in need of their expertise. If you're a tech-savvy individual aiming to transform proposals into profits, this blog is your guide to mastering IT sales on Upwork.
Understanding the Upwork Landscape:
Delve into the nuances of the Upwork platform. Explore its structure, client expectations, and the competitive IT sales landscape.
Selecting the Right IT Projects:
Not all projects are created equal. Navigate Upwork's project listings effectively to identify opportunities that align with your skills and business goals.
Effective Communication with Clients:
Master the art of communication on Upwork. Learn how to engage with clients, ask the right questions, and demonstrate your understanding of their needs.
Setting Realistic Milestones:
Break down projects into manageable milestones. Present clients with a clear roadmap, fostering confidence in your ability to deliver quality results.
Showcasing Your Expertise:
Leverage Upwork's portfolio feature to showcase your previous work. Craft a compelling narrative around your IT accomplishments to establish credibility.
Building Long-Term Client Relationships:
Explore strategies for turning one-off projects into long-term relationships. Cultivate client trust, and discover the benefits of repeat business on Upwork.
Navigating Challenges:
Every journey has its hurdles. Explore common challenges on Upwork and gain insights into overcoming obstacles to ensure a thriving IT sales career.
Optimizing Your Upwork Workflow:
Time is money. Discover tools and techniques to streamline your workflow on Upwork, ensuring maximum efficiency and profitability.
Conclusion:
With the right approach, Upwork can be a lucrative platform for mastering IT sales. From crafting winning proposals to building lasting client relationships, this blog has equipped you with the knowledge to turn your efforts into tangible profits. Now, go forth and conquer the world of IT sales on Upwork!

From Proposals to Profits: Mastering IT Sales on UpworkSales

From Proposals to Profits: Mastering IT Sales on UpworkSales
In the dynamic world of IT sales, Upwork stands out as a powerful platform, connecting skilled professionals with businesses in need of their expertise. If you're a tech-savvy individual aiming to transform proposals into profits, this blog is your guide to mastering IT sales on Upwork.
Understanding the Upwork Landscape:
Delve into the nuances of the Upwork platform. Explore its structure, client expectations, and the competitive IT sales landscape.
Selecting the Right IT Projects:
Not all projects are created equal. Navigate Upwork's project listings effectively to identify opportunities that align with your skills and business goals.
Effective Communication with Clients:
Master the art of communication on Upwork. Learn how to engage with clients, ask the right questions, and demonstrate your understanding of their needs.
Setting Realistic Milestones:
Break down projects into manageable milestones. Present clients with a clear roadmap, fostering confidence in your ability to deliver quality results.
Showcasing Your Expertise:
Leverage Upwork's portfolio feature to showcase your previous work. Craft a compelling narrative around your IT accomplishments to establish credibility.
Building Long-Term Client Relationships:
Explore strategies for turning one-off projects into long-term relationships. Cultivate client trust, and discover the benefits of repeat business on Upwork.
Navigating Challenges:
Every journey has its hurdles. Explore common challenges on Upwork and gain insights into overcoming obstacles to ensure a thriving IT sales career.
Optimizing Your Upwork Workflow:
Time is money. Discover tools and techniques to streamline your workflow on Upwork, ensuring maximum efficiency and profitability.
Conclusion:
With the right approach, Upwork can be a lucrative platform for mastering IT sales. From crafting winning proposals to building lasting client relationships, this blog has equipped you with the knowledge to turn your efforts into tangible profits. Now, go forth and conquer the world of IT sales on Upwork!
LinkedIn Sales Prospecting: Finding and Nurturing LeadsSales

LinkedIn Sales Prospecting: Finding and Nurturing LeadsSales
Prospecting for leads is a fundamental aspect of successful sales, and LinkedIn has emerged as a treasure trove for B2B sales professionals seeking to identify, connect with, and nurture potential clients. In this blog, we'll explore the art and science of LinkedIn sales prospecting, including strategies for finding promising leads and nurturing them into valuable customers.
The Power of LinkedIn in Sales Prospecting
LinkedIn's vast user base of professionals, robust search features, and the ability to connect with individuals across industries make it an ideal platform for sales prospecting. Here's how to leverage LinkedIn effectively:
Define Your Ideal Customer Profile (ICP)
Before diving into prospecting, it's crucial to have a clear understanding of your ideal customer. Identify key attributes such as industry, job title, company size, location, and pain points. This information will help you target your efforts effectively.
Optimize Your LinkedIn Profile
Your LinkedIn profile is your digital storefront. Ensure it is complete, professional, and showcases your expertise. Prospective leads will often check your profile when you reach out to them, so make a strong first impression.
Use Advanced Search Filters
LinkedIn offers advanced search filters that allow you to narrow down potential leads based on specific criteria. Use these filters to find individuals or companies that match your ICP. Filters can include industry, job title, company size, location, and more.
Warm-Up Cold Leads
When you identify potential leads, take a strategic approach to connect with them. Craft personalized connection requests that explain why you want to connect and how you can provide value. Mention mutual connections, interests, or recent interactions to increase your chances of acceptance.
Engage with Content
Consistently share valuable content related to your industry. This establishes you as a knowledgeable and trusted source. Engage with your network's content by liking, commenting, and sharing. These interactions help you stay visible and on the radar of your connections.
Utilize LinkedIn Sales Navigator
Consider investing in LinkedIn Sales Navigator, a premium tool designed for sales professionals. It offers enhanced search capabilities, lead recommendations, and real-time insights, making it easier to identify and engage with potential leads.
In conclusion, LinkedIn sales prospecting is a powerful tool for identifying and nurturing potential clients. By defining your ideal customer profile, optimizing your profile, leveraging advanced search filters, and using personalized outreach, you can effectively find and engage with leads on LinkedIn. Remember that successful prospecting takes time, patience, and a commitment to building long-term relationships rather than pursuing quick transactions.
LinkedIn for Sales: Strategies to Connect, Engage, and ConvertSales

LinkedIn for Sales: Strategies to Connect, Engage, and ConvertSales
In the world of modern sales, building relationships and nurturing leads are crucial components of success. LinkedIn, the world's largest professional network, offers an invaluable platform for sales professionals to connect with potential clients, engage in meaningful conversations, and ultimately convert leads into customers. In this blog, we'll explore effective LinkedIn strategies that can help you achieve your sales goals.
Optimize Your LinkedIn Profile
Your LinkedIn profile serves as your digital business card. Ensure it presents you as a professional, trustworthy, and knowledgeable individual. Key optimization tips include:
Professional Photo: Use a high-quality, friendly, and professional profile picture.
Engaging Headline: Craft a concise and attention-grabbing headline that communicates your value.
Informative Summary: Write a compelling summary highlighting your expertise, achievements, and goals.
Keyword Optimization: Use relevant keywords in your profile to make it discoverable in searches.
Define Your Target Audience
Identify your ideal customers and create buyer personas. This will help you tailor your LinkedIn activities to attract and engage with the right people. Consider factors such as industry, job title, location, and company size to narrow down your audience.
Engage with Content
Content is king on LinkedIn. Regularly share valuable content, including articles, updates, and insights related to your industry. Engage with your network's content by liking, commenting, and sharing. Consistent engagement keeps you visible and positions you as a thought leader in your field.
Use LinkedIn Sales Navigator
LinkedIn offers a premium tool called Sales Navigator designed explicitly for sales professionals. This tool provides advanced search capabilities, lead recommendations, and real-time insights to help you find and engage with potential clients effectively.
Personalize Your Outreach
When reaching out to potential leads or prospects, avoid generic or overly salesy messages. Instead, craft personalized and thoughtful messages that address the individual's specific needs or challenges. Mention mutual connections or shared interests to establish rapport.
Join and Participate in LinkedIn Groups
LinkedIn Groups provide excellent opportunities to connect with like-minded professionals and engage in industry-related discussions. Join relevant groups and contribute valuable insights to establish your expertise.
Monitor and Measure Results
Use LinkedIn analytics to track the performance of your activities. Monitor profile views, connection acceptance rates, and engagement with your content. Adjust your strategies based on what yields the best results.
In conclusion, LinkedIn is a powerful tool for sales professionals looking to connect, engage, and convert leads into clients. By optimizing your profile, defining your target audience, sharing valuable content, and personalizing your outreach, you can unlock the full potential of LinkedIn as a sales platform. Remember that successful LinkedIn sales strategies require time, effort, and a commitment to building meaningful and mutually beneficial relationships.
Integrate CCAvenue Payment Gateway with LaravelLaravel
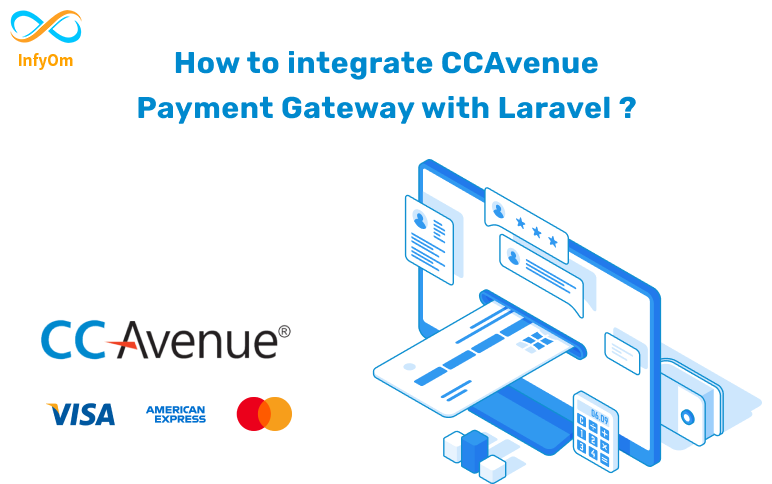
Integrate CCAvenue Payment Gateway with LaravelLaravel
This is the hardest thing as a developer I found, as there is no official documentation available to integrate the CCAvenue. Also, you will not find any tutorial or blog from which you can do the implementation.
So, in this tutorial, we are going to cover how we can integrate the CCAvenue payment gateway with Laravel.
web.php
Route::post('purchase', [CCAvenueController::class, purchaseSubscription']);
CCAvenueController.php
public function purchaseSubscription(Request $request)
{
    $input = $request->all();

    $input['amount'] = $data['grandTotal'];
    $input['order_id'] = "123XSDDD456";
    $input['currency'] = "INR";
    $input['redirect_url'] = route('cc-response');
    $input['cancel_url'] = route('cc-response');
    $input['language'] = "EN";
    $input['merchant_id'] = "your-merchant-id";

    $merchant_data = "";

    $working_key = config('cc-avenue.working_key'); //Shared by CCAVENUES
    $access_code = config('cc-avenue.access_code'); //Shared by CCAVENUES

    $input['merchant_param1'] = "some-custom-inputs"; // optional parameter
    $input['merchant_param2'] = "some-custom-inputs"; // optional parameter
    $input['merchant_param3'] = "some-custom-inputs"; // optional parameter
    $input['merchant_param4'] = "some-custom-inputs"; // optional parameter
    $input['merchant_param5'] = "some-custom-inputs"; // optional parameter
    foreach ($input as $key => $value) {
        $merchant_data .= $key . '=' . $value . '&';
    }

    $encrypted_data = $this->encryptCC($merchant_data, $working_key);
    $url = config('cc-avenue.url') . '/transaction/transaction.do?command=initiateTransaction&encRequest=' . $encrypted_data . '&access_code=' . $access_code;

    return redirect($url);
}
Manage Callback
public function ccResponse(Request $request)
{
    try {
        $workingKey = config('cc-avenue.working_key'); //Working Key should be provided here.
        $encResponse = $_POST["encResp"];

        $rcvdString = $this->decryptCC($encResponse, $workingKey);        //Crypto Decryption used as per the specified working key.
        $order_status = "";
        $decryptValues = explode('&', $rcvdString);
        $dataSize = sizeof($decryptValues);
}
Other Encryption functions
public function encryptCC($plainText, $key)
{
    $key = $this->hextobin(md5($key));
    $initVector = pack("C*", 0x00, 0x01, 0x02, 0x03, 0x04, 0x05, 0x06, 0x07, 0x08, 0x09, 0x0a, 0x0b, 0x0c, 0x0d, 0x0e, 0x0f);
    $openMode = openssl_encrypt($plainText, 'AES-128-CBC', $key, OPENSSL_RAW_DATA, $initVector);
    $encryptedText = bin2hex($openMode);
    return $encryptedText;
}

public function decryptCC($encryptedText, $key)
{
    $key = $this->hextobin(md5($key));
    $initVector = pack("C*", 0x00, 0x01, 0x02, 0x03, 0x04, 0x05, 0x06, 0x07, 0x08, 0x09, 0x0a, 0x0b, 0x0c, 0x0d, 0x0e, 0x0f);
    $encryptedText = $this->hextobin($encryptedText);
    $decryptedText = openssl_decrypt($encryptedText, 'AES-128-CBC', $key, OPENSSL_RAW_DATA, $initVector);
    return $decryptedText;
}

public function pkcs5_padCC($plainText, $blockSize)
{
    $pad = $blockSize - (strlen($plainText) % $blockSize);
    return $plainText . str_repeat(chr($pad), $pad);
}

public function hextobin($hexString)
{
    $length = strlen($hexString);
    $binString = "";
    $count = 0;
    while ($count < $length) {
        $subString = substr($hexString, $count, 2);
        $packedString = pack("H*", $subString);
        if ($count == 0) {
            $binString = $packedString;
        } else {
            $binString .= $packedString;
        }

        $count += 2;
    }
    return $binString;
}
That's it.
So that is how you can integrate the CCAvenue Payment Gateway with Laravel.

What is A/B testing?
A/B testing (also known as split testing or bucket testing) is a methodology for comparing two versions of a webpage or app against each other to determine which one performs better.
A/B testing is essentially an experiment where two or more variants of a page are shown to users at random, and statistical analysis is used to determine which variation performs better for a given conversion goal.

Running an A/B test that directly compares a variation against a current experience lets you ask focused questions about changes to your website or app and then collect data about the impact of that change.
Testing takes the guesswork out of website optimization and enables data-informed decisions that shift business conversations from "we think" to "we know." By measuring the impact that changes have on your metrics, you can ensure that every change produces positive results.
How A/B testing works
In an A/B test, you take a webpage or app screen and modify it to create a second version of the same page. This change can be as simple as a single headline button, or be a complete redesign of the page. Then, half of your traffic is shown the original version of the page (known as control or A) and half are shown the modified version of the page (the variation or B).

As visitors are served either the control or variation, their engagement with each experience is measured and collected in a dashboard and analyzed through a statistical engine. You can then determine whether changing the experience (variation or B) had a positive, negative or neutral effect against the baseline (control or A).

Why you should A/B test
A/B testing allows individuals, teams and companies to make careful changes to their user experiences while collecting data on the impact it makes. This allows them to construct hypotheses and to learn what elements and optimizations of their experiences impact user behaviour the most. In another way, they can be proven wrong—their opinion about the best experience for a given goal can be proven wrong through an A/B test.
More than just answering a one-off question or settling a disagreement, A/B testing can be used to continually improve a given experience or improve a single goal like conversion rate optimization (CRO) over time.
A B2B technology company may want to improve their sales lead quality and volume from campaign landing pages. In order to achieve that goal, the team would try A/B testing changes to the headline, subject line, form fields, call-to-action and overall layout of the page to optimize for reduced bounce rate, increased conversions and leads and improved click-through rate.
Testing one change at a time helps them pinpoint which changes had an effect on visitor behaviour, and which ones did not. Over time, they can combine the effect of multiple winning changes from experiments to demonstrate the measurable improvement of a new experience over the old one.
This method of introducing changes to a user experience also allows the experience to be optimized for a desired outcome and can make crucial steps in a marketing campaign more effective.
By testing ad copy, marketers can learn which versions attract more clicks. By testing the subsequent landing page, they can learn which layout converts visitors to customers best. The overall spend on a marketing campaign can actually be decreased if the elements of each step work as efficiently as possible to acquire new customers.

A/B testing can also be used by product developers and designers to demonstrate the impact of new features or changes to a user experience. Product onboarding, user engagement, modals and in-product experiences can all be optimized with A/B testing, as long as goals are clearly defined and you have a clear hypothesis.
A/B testing process
The following is an A/B testing framework you can use to start running tests:
Collect data:
Your analytics tool (for example Google Analytics) will often provide insight into where you can begin optimizing. It helps to begin with high traffic areas of your site or app to allow you to gather data faster. For conversion rate optimization, make sure to look for pages with high bounce or drop-off rates that can be improved. Also consult other sources like heatmaps, social media and surveys to find new areas for improvement.
Identify goals:
Your conversion goals are the metrics that you are using to determine whether the variation is more successful than the original version. Goals can be anything from clicking a button or link to product purchases.
Generate test hypothesis:
Once you've identified a goal, you can begin generating A/B testing ideas and test hypotheses for why you think they will be better than the current version. Once you have a list of ideas, prioritize them in terms of expected impact and difficulty of implementation.
Create different variations:
Using your A/B testing software (like Optimize Experiment), make the desired changes to an element of your website or mobile app. This might be changing the colour of a button, swapping the order of elements on the page template, hiding navigation elements, or something entirely custom. Many leading A/B testing tools have a visual editor that will make these changes easy. Make sure to test run your experiment to make sure the different versions as expected.
Run experiment:
Kick off your experiment and wait for visitors to participate! At this point, visitors to your site or app will be randomly assigned to either the control or variation of your experience. Their interaction with each experience is measured, counted and compared against the baseline to determine how each performs.
Wait for the test results:
Depending on how big your sample size (the target audience) is, it can take a while to achieve a satisfactory result. Good experiment results will tell you when the results are statistically significant and trustworthy. Otherwise, it would be hard to tell if your change truly made an impact.
Analyse results:
Once your experiment is complete, it's time to analyse the results. Your A/B testing software will present the data from the experiment and show you the difference between how the two versions of your page performed, and whether there is a statistically significant difference. It is important to achieve statistically significant results, so you’re confident in the outcome of the test.
If your variation is a winner, congratulations 🎉🎉🎉! See if you can apply learnings from the experiment on other pages of your site, and continue iterating on the experiment to improve your results. If your experiment generates a negative result or no result, don't worry. Use the experiment as a learning experience and generate new hypothesis that you can test.

Whatever your experiment's outcome, use your experience to inform future tests and continually iterate on optimizing your app or site's experience.

Regression Testing Techniques & ToolsTesting

Regression Testing Techniques & ToolsTesting
Regression Testing Techniques:
Retest All:
Retest All In this technique, the entire test suite is executed again to verify that no existing functionality has been affected by recent code changes. It's a comprehensive but time-consuming approach.
Selective Regression Testing:
Selective Regression Testing This technique involves selecting a subset of test cases from the existing test suite that is most likely to be affected by the code changes. It's a more efficient approach compared to retesting all test cases.
Test Case Prioritization:
Test Case Prioritization Test cases are prioritized based on factors like their likelihood of failure, criticality, and importance to the application. High-priority test cases are executed first to quickly identify issues.
Test Automation:
Test Automation tools are used to create and execute test scripts that can be easily rerun whenever there are code changes. Popular automation tools include Selenium, Appium, and JUnit for Java applications.

Regression Testing Tools:
Selenium:
Selenium is one of the most popular open-source automation testing tools for web applications. It supports multiple programming languages and browsers and allows testers to create robust regression test suites.
Appium:
Appium is an open-source tool for automating mobile applications on Android and iOS platforms. It can be used for regression testing of mobile apps.
JUnit:
JUnit is a widely-used testing framework for Java applications. It's especially useful for unit and regression testing in the Java ecosystem.
TestNG:
TestNG is another Java-based testing framework that offers more advanced testing features compared to JUnit, making it suitable for regression testing.
Jenkins:
Jenkins is a popular open-source automation server that can be used to automate the execution of regression test suites. It integrates with various testing tools and can schedule test runs based on code changes.
Postman:
Postman is a popular tool for testing RESTful APIs. It can be used for API regression testing to ensure that changes in the API do not break existing functionality.
TestRail:
TestRail is a test management tool that helps teams organize and manage their regression test cases, track test results, and collaborate on testing efforts.
JIRA:
JIRA, developed by Atlassian, is an issue and project tracking tool that can be used for managing and tracking regression test cases and defects.
Travis CI:
Travis CI is a continuous integration tool that can be used to automate the execution of regression tests whenever code changes are pushed to a version control system like GitHub.
CircleCI:
CircleCI is another continuous integration and continuous delivery (CI/CD) platform that supports automated regression testing as part of the software development pipeline.
The choice of regression testing technique and tool depends on the specific requirements of your project, the nature of the application, and the resources available. It's essential to select the most appropriate combination to ensure effective regression testing and maintain the quality of your software.
Verification and Validation: What’s the difference?Testing

Verification and Validation: What’s the difference?Testing
Differences between Verification and Validation
| Verification | Validation |
|---|---|
| It includes checking documents, design, codes and programs. | It includes testing and validating the actual product. |
| Verification is the static testing. | Validation is the dynamic testing. |
| It does not include the execution of the code. | It includes the execution of the code. |
| Methods used in verification are reviews, walkthroughs, inspections and desk-checking. | Methods used in validation are Black Box Testing, White Box Testing and non-functional testing. |
| It checks whether the software conforms to specifications or not. | It checks whether the software meets the requirements and expectations of a customer or not. |
| It can find the bugs in the early stage of the development. | It can only find the bugs that could not be found by the verification process. |
| The goal of verification is application and software architecture and specification. | The goal of validation is an actual product. |
| Quality assurance team does verification. | Validation is executed on software code with the help of testing team. |
| It comes before validation. | It comes after verification. |
| It consists of checking of documents/files and is performed by human. | It consists of execution of program and is performed by computer. |
| Verification refers to the set of activities that ensure software correctly implements the specific function. | Validation refers to the set of activities that ensure that the software that has been built is traceable to customer requirements. |
| After a valid and complete specification, the verification starts. | Validation begins as soon as project starts. |
| Verification is for prevention of errors. | Validation is for detection of errors. |
| Verification is also termed as white box testing or static testing as work product goes through reviews. | Validation can be termed as black box testing or dynamic testing as work product is executed. |
| Verification finds about 50 to 60% of the defects. | Validation finds about 20 to 30% of the defects. |
| Verification is based on the opinion of reviewer and may change from person to person. | Validation is based on the fact and is often stable. |
| Verification is about process, standard and guideline. | Validation is about the product. |

Verification :
Verification is the process of checking that a software achieves its goal without any bugs. It is the process to ensure whether the product that is developed is right or not. It verifies whether the developed product fulfils the requirements that we have. Verification is static testing.
Validation :
Validation is the process of checking whether the software product is up to the mark or in other words product has high level requirements. It is the process of checking the validation of product, i.e. it checks what we are developing is the right product. It is validation of actual and expected product. Validation is the dynamic testing.


